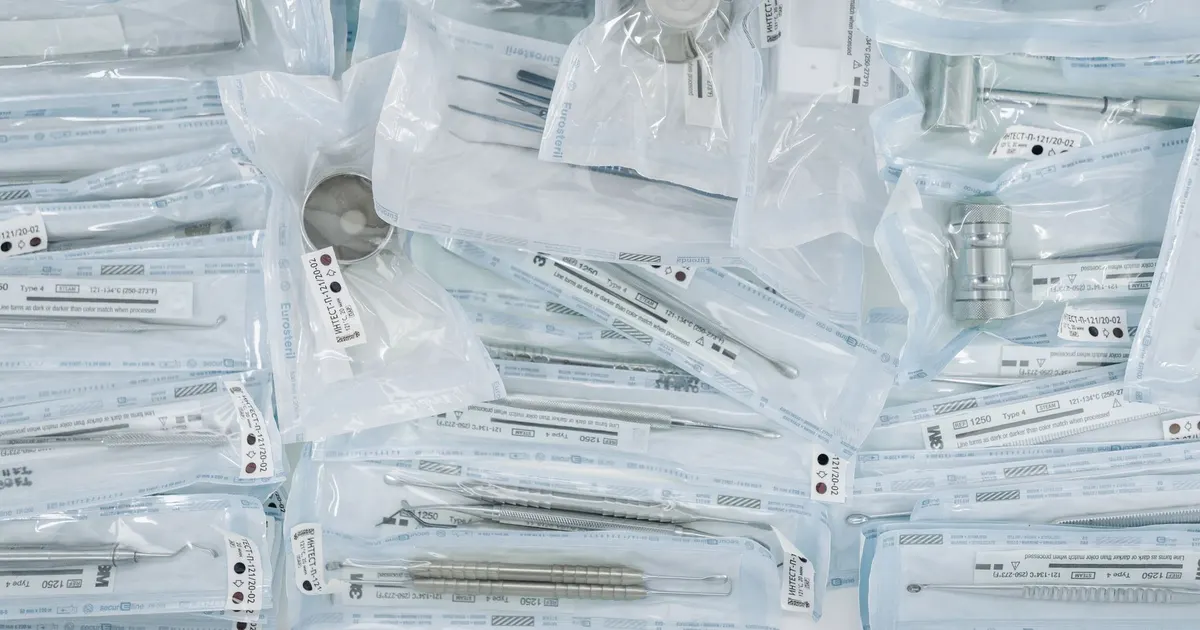
A medical part is not finished when the last cut is made. It leaves the machine covered in coolant, oil, fine chips and fingerprints, and it will be handled several times before it reaches the buyer. How it is cleaned, dried, inspected and packed decides whether it arrives ready for the buyer’s own cleaning line or needs to be reworked on receipt.
This guide covers what a normal cleaning and packing sequence looks like for machined medical parts, what records to ask for and where the responsibility of the shop ends and the responsibility of the device maker begins. The figures are typical values from the partner shops we match RFQs to, confirmed per drawing.
What is on a part when it leaves the machine
Four kinds of contamination account for almost every cleaning problem on machined parts.
- Cutting fluid and oil. Coolant films, way oil and tapping oil sit in blind holes, threads and cross holes where they are hard to reach.
- Chips and fines. Small chips lodge in threads, slots and the lattice of a perforated part. Fine particles from grinding and polishing stay on the surface.
- Handling residue. Fingerprints, glove powder and lint appear at every manual step.
- Process residue. Residues from deburring media, polishing compounds, passivation acids and electropolish electrolytes must be rinsed away completely.
A part that is only wiped may look clean and still carry residue in its holes. This is why the cleaning sequence is built around immersion and rinsing, not wiping.
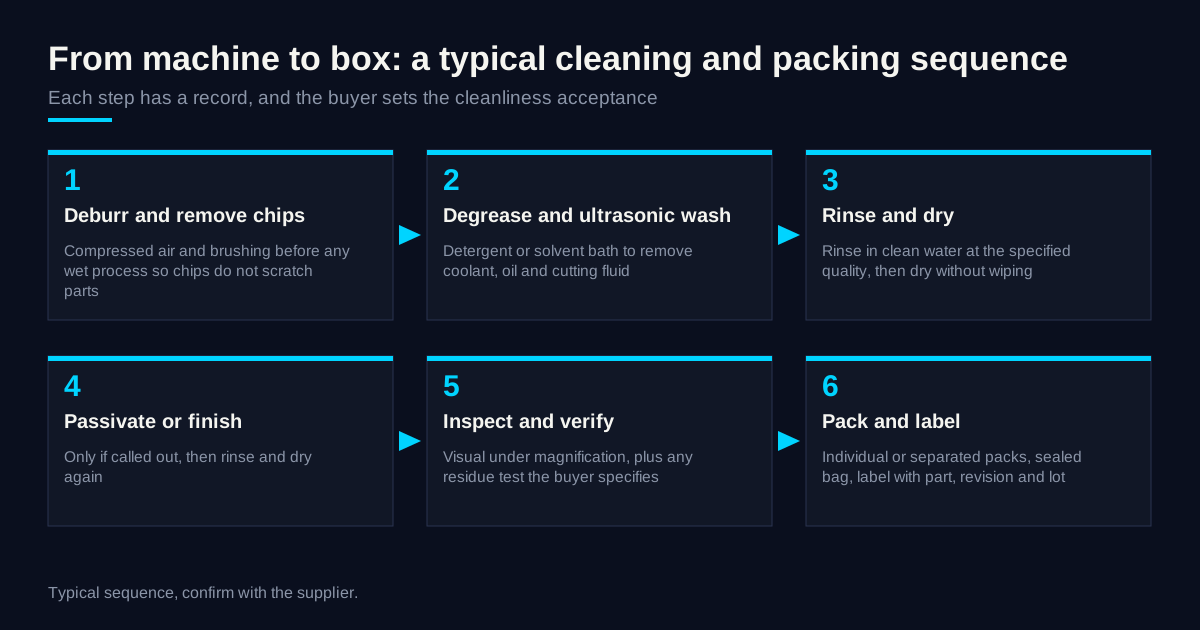
A typical cleaning sequence
The exact steps depend on the material, the geometry and the buyer’s requirement, but the order is usually the same.
- Dry deburr and chip removal. Compressed air, brushing and vacuum remove loose chips before any wet process, so chips do not scratch the parts in the bath.
- Degrease and wash. An aqueous detergent or a solvent bath dissolves oils and coolant. Parts with blind holes are agitated or flushed so the fluid reaches inside.
- Ultrasonic cleaning. Ultrasonic energy releases particles from threads, grooves and fine features. Frequency, temperature and time are set by the shop and recorded on the process sheet.
- Rinse. A rinse in clean water, often deionized for final stages, removes detergent residue. The water quality the buyer expects should be stated.
- Dry. Hot air, a low-temperature oven or a vacuum dry removes water without wiping. Water left in blind holes is a common cause of stains and corrosion on stainless parts.
- Passivation or finishing if specified. After these steps the part is rinsed and dried again.
- Inspect and pack. Parts are checked under magnification and packed in a controlled area at a clean bench with gloves.
If the drawing requires cleanroom-level handling, say so in the RFQ. We only propose shops that confirm in writing what they can do, and no cleanroom or certification claim is made on this site.
How cleanliness is verified
Cleanliness acceptance should be a stated requirement, not a shared feeling. The common options are:
| Method | What it shows | When it is used |
|---|---|---|
| Visual inspection under magnification | No visible residue, chips or stains | Default for most parts |
| White cloth or swab wipe test | Visible residue transfer | Quick check on flat or open surfaces |
| Water break or surface appearance check | Oil film or uneven surface | After final rinse |
| Gravimetric residue extraction | Mass of extractable residue | Buyer-specified, often for implants |
| Particle count | Number and size of particles | Fluid-handling parts, buyer-specified |
For metallic components, ASTM F2459 is a published test method for extracting residue and quantifying it by gravimetric analysis, and it is often referenced in medical specifications. Whether it applies, and what limit is acceptable, is the buyer’s decision. A shop can run an agreed test method and report the result, but it should not set the limit.
Packaging that protects the part
Good packaging has three jobs: protect surfaces and edges, keep the lot identified and keep the parts clean until they are opened. The options below are typical.
| Packaging | Typical use | Watch out for |
|---|---|---|
| Individual polyethylene bag, heat sealed | Small parts, screws, pins | Static, sharp edges puncturing the bag |
| Foam or thermoformed tray with lid | Delicate or cosmetic parts, instruments | Foam shedding particles, check material |
| Individual lint-free wrap | Polished or cosmetic surfaces | Wrap fibers on rough surfaces |
| Double bag with a label between layers | Parts that go to the buyer’s cleaning line | Label ink must not reach the part |
| Desiccant in the outer bag | Long sea freight | Desiccant dust, check it is contained |
| Outer carton with dividers | Mixed lots, shipment | Lot mixing if dividers are missing |
Do not assume that oil, rust inhibitor paper or volatile corrosion inhibitor additives are acceptable. Many medical buyers prohibit them because they leave residues that complicate the buyer’s cleaning. The purchase order should state what is allowed in the pack.
Labels and lot identity
Every pack should carry the part number, the drawing revision, the quantity and the lot or batch number, so that a part in a box can be traced back to its material heat number and inspection record. Where the buyer wants laser marking or a printed label, the content and position should be on the drawing or the purchase order. The quality and documentation page describes the traceability records that normally go with a lot.
Mixed lots in the same pack are a common failure. A simple rule that avoids it is one lot per bag and one lot per carton, with a label on both.
Shipping and handling
Packaging has to survive the journey as well. For air freight, a rigid inner box and a corrugated outer carton, with dividers between lots, is common. For sea freight, add moisture protection. For heavy or fragile parts, specify the pack layout in the RFQ. Parts should not be loose in a carton, and polished parts should not touch each other.
Hard cases: blind holes, threads and plastics
Some geometries need more than the standard sequence. Blind holes and cross holes trap fluid, so they are flushed with a jet or cleaned in a bath with agitation and then dried with warm air. Fine threads trap chips and are inspected with a magnifier, sometimes after a thread gauge has been run through them. Perforated or lattice parts need ultrasonic time and a long enough rinse that the detergent does not stay in the openings.
Plastic parts behave differently. PEEK and other polymers tolerate most aqueous cleaning, but they absorb a little moisture and can hold solvents, so the drying step is longer and the solvent choice is limited. Soft plastics scratch easily, so they are not packed loose with metal parts. If a polymer part has a tight tolerance, it should stabilize at room temperature before measurement and packing.
Mixed assemblies, for example a metal sleeve with a plastic insert, are cleaned according to the most sensitive material. State the limits for each material on the drawing, because a bath that suits stainless steel can be wrong for the plastic part next to it.
Prototype packing versus production packing
A prototype order of five parts and a production order of five hundred need different packing, and it is better to say so in the RFQ than to find out at the dock. Prototypes are usually packed individually, each in its own labeled bag, because every piece is inspected and every piece matters. Production lots are packed in counted bags, often 10 or 25 pieces each, inside labeled cartons, with the inspection records enclosed or sent by email. The quantity per bag should match how the buyer’s line uses the parts, so that no one has to open a pack of 100 to take out 5.
Common failure modes
Most complaints about cleaning and packing come from the same short list:
- Chips left in a blind hole or thread after a good-looking wash.
- Water spots and staining from parts that were not fully dried.
- Scratches from parts that touched each other in a bag or tray.
- Mixed lots in one pack because the dividers or labels were missing.
- An oil film from an inhibitor paper that the buyer did not want.
- Label adhesive or ink in contact with a polished surface.
Each one is cheap to prevent if the requirement is written down, and expensive to correct once parts have crossed a border. Packing also decides what a cargo claim looks like; see cargo insurance for machined medical parts.
What the device maker still owns
Cleaning and packaging by the shop prepare the part for the buyer’s next step. They do not replace the buyer’s own processes. The device maker remains responsible for the final cleaning process and its validation, sterilization and its validation, the sterile barrier system where it applies, biocompatibility and every regulatory submission. If the shipped parts go to a final cleaning and packaging line, say so, because the shop’s packing can then be simpler.
A short checklist for your RFQ
- State how parts should be cleaned and the acceptance method.
- State what is and is not allowed in the pack, such as oils and inhibitor papers.
- Specify the pack type, the quantity per pack and the label content.
- Say whether parts go to your cleaning line or direct to assembly.
- Name the records you want with each lot, such as the process sheet and the visual inspection record.
When the requirements are written down, send the drawing and the notes through the RFQ form and you will receive a response, with a matched shop and any packing questions, within 24 business hours. The capabilities page lists the finishing processes that are available.